When a storm rips through your neighborhood or years of wear finally take their toll, replacing your roof can feel overwhelming. Not only is it a major investment, but navigating the insurance process can be just as stressful as the damage itself. The good news is that many homeowners can get help from their insurance provider if they know what to expect, how to qualify, and how to avoid the common pitfalls that lead to denied claims.
In this guide, we’ll explain everything you need to know about how to get insurance to pay for roof replacement, from understanding your policy, filing a claim, getting approved, and receiving that final check. We’ll also share tips for avoiding scams, keeping thorough records, and knowing what to do if your claim gets denied.
Understanding Your Insurance Policy
Insurance policies can feel like they’re written in another language, but understanding the basics is the first step toward maximizing your coverage. The way your policy defines value, coverage, and deductibles can directly impact how much of your roof replacement costs are paid.
Replacement Cost Value (RCV) vs. Actual Cash Value (ACV)
One of the biggest factors in how much your insurer will cover for roof replacement comes down to whether your policy is based on Replacement Cost Value (RCV) or Actual Cash Value (ACV).
- Replacement Cost Value (RCV): This type of policy pays to replace your roof with a new one of a similar kind and quality, without deducting for depreciation. For example, if your 15-year-old roof is destroyed by hail and costs $18,000 to replace, your insurance company would pay the full $18,000 minus your deductible.
- Actual Cash Value (ACV): With ACV, depreciation is factored in. That same 15-year-old roof might only be valued at $10,000 due to its age and condition. In that case, your insurer would pay $10,000 minus your deductible, leaving you to cover the difference.
Knowing whether your policy uses RCV or ACV can mean the difference of thousands of dollars when filing a roof damage insurance claim.
Covered Perils vs. Exclusions
Not every type of roof damage is covered. Most homeowner’s insurance policies protect against sudden, accidental events like:
- Hailstorms
- Wind damage
- Fallen trees
- Fire
But they typically do NOT cover issues caused by:
- Age and normal wear and tear
- Lack of maintenance
- Poor installation
- Long-term leaks
For instance, if your 25-year-old roof simply wears out, insurance likely won’t step in. But if a hailstorm knocks loose shingles and causes a leak, that’s generally considered a covered peril.
Deductibles & Special Storm Deductibles
Every insurance policy requires you to pay a deductible before coverage kicks in. Standard deductibles are often a flat dollar amount, such as $1,500.
However, in high-risk states where hurricanes, tornadoes, or hail are common, insurers may apply a percentage-based storm deductible instead. For example:
- Your policy may require you to pay 2% of your home’s insured value for storm-related claims.
- If your home is insured for $300,000, that deductible could be $6,000 out-of-pocket before insurance covers the rest.
Some states also allow special deductibles for catastrophic weather events, so it’s important to read the fine print and know your obligations before damage occurs.

When Insurance Will Approve a Roof Replacement
Insurance companies don’t approve every roof replacement insurance claim, even when damage is evident to the homeowner. To get coverage, the damage must meet certain conditions outlined in your policy.
What Qualifies as “Sudden Damage”?
Insurers are primarily concerned with sudden, accidental events that cause immediate harm. These include:
- Severe wind uplift from storms
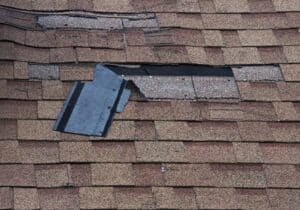
- Hail strikes that break or dent shingles
- Tree limbs falling during a storm
- Heavy snow or ice collapse
What they don’t usually cover are long-term problems, such as gradual leaks, shingle curling, or mold growth from neglect. If the insurer believes the damage happened slowly over time, it may deny the claim.
Roof Age and Condition
The age of your roof also plays a major role in whether insurance will pay for a full replacement. Many providers set cutoffs for coverage:
- Roofs older than 20 years may have limited coverage.
- Some policies reduce payouts for roofs over a certain age, even under RCV policies.
- Newer roofs in good condition are far more likely to be approved for full replacement.
This is why routine inspections and maintenance are so important. Documenting your roof’s age and upkeep helps prove that sudden damage, not neglect, caused the problem.
Step-by-Step Roof Damage Claim Process
Filing a roof damage claim can feel like a maze. Following a clear process helps you avoid delays and increases your chances of approval.
Step 1: Inspect and Document Damage
As soon as it’s safe after a storm, inspect your roof and property. Take:
- Photos from multiple angles (both close-up and wide shots).
- Videos that show context (like tree branches on the roof).
- Timestamped evidence to prove when the damage occurred.
Don’t forget to capture interior signs, such as water stains or ceiling leaks. The more evidence you provide, the harder it is for the insurer to dispute your claim.
Step 2: Schedule a Roof Inspection
Your insurance company will want professional confirmation of the damage. Hiring a licensed, reputable roofing contractor for an inspection ensures the report is detailed and credible.
Contractors can provide:
- An official damage assessment
- Repair or replacement estimates
- Written proof that the damage was storm-related
Start by scheduling a roof inspection before filing your claim. This not only strengthens your case but also ensures you know the true scope of the damage.
Step 3: Contact Your Insurance Company and Start the Claim
Once you have the documentation and inspection results, contact your insurer. Most allow claims through:
- Phone calls
- Mobile apps
- Online portals
Be ready to provide your policy number, photos, inspection reports, and a description of the damage. Keep in mind that filing deadlines matter. Waiting too long after the event could lead to automatic denial.
Step 4: What to Expect When the Adjuster Visits
After filing, your insurance provider will send an adjuster to assess the damage. Their job is to:
- Verify your claim
- Inspect the roof and property
- Estimate repair or replacement costs
Pro tip: We recommend being present during the inspection to avoid any complications. If possible, have your roofing contractor present as well. They can answer technical questions and advocate for necessary repairs.

After Approval: Getting Paid and Replacement Done
Once your insurance company approves the claim, the focus shifts to getting your roof replaced and managing payments.
Replacing Your Storm-Damaged Roof
After approval, your insurer issues the first portion of your claim payout, known as the ACV payment (if your policy is RCV). This upfront check covers the depreciated value of your roof. Once repairs or replacement are completed, you’ll receive the remaining balance.
The roof replacement process usually looks like this:
- The contractor schedules the project.
- The old roof is removed, and the damage is repaired.
- The new materials are installed.
- The contractor submits completion documentation to your insurer.
At this point, your roof should be restored to pre-loss condition or better.
Getting the Final Check for Your Roof Replacement
After your contractor completes the work, the insurance company will release the final payment. Known as recoverable depreciation, this ensures that funds are only fully disbursed once the repairs have been verified.
Pro tip: Stay in communication with both your contractor and insurer to prevent delays in receiving this last check.
What If Your Claim Is Denied?
Even when you follow every step correctly, some claims get denied. Understanding why can help you prepare an appeal.
Common Reasons for Denial
Insurance companies typically deny roof replacement claims for reasons such as:
- Damage attributed to normal wear and tear
- Filing the claim too late after the event
- Lack of documentation (few or no photos/videos)
- Pre-existing roof issues not caused by the storm
For example, if a roof was already leaking before a hailstorm, the insurer may argue that the storm wasn’t the primary cause.
Steps to Appeal or Dispute
If your claim is denied, don’t give up immediately. Options include:
- Reviewing the denial letter: Insurers must explain why coverage was refused.
- Requesting a re-inspection: Especially helpful if you suspect the adjuster missed something.
- Hiring a public adjuster: These licensed professionals work on your behalf to negotiate with insurers.
- Bringing in your contractor’s evidence: Inspection reports and repair estimates can strengthen your appeal.
Persistence, combined with strong documentation, often makes the difference in disputed claims.

Tips & Pitfalls to Consider During Your Roof Replacement Claim
Even if your claim is approved, there are still traps that can cost you time and money. Avoiding these pitfalls helps ensure the process goes smoothly.
Avoid Contractor or Insurance Scams
Unfortunately, storms often attract fly-by-night roofers who travel from town to town, chasing quick payouts. To protect yourself:
- Verify licenses and insurance before hiring.
- Check online reviews and local references.
- Avoid anyone pressuring you to sign immediately or demanding large upfront payments.
Sticking with a reputable, local contractor ensures your warranty and workmanship will last. If you’re still unsure, read our guide on how to check if a roofing contractor is legit.
Keeping Thorough Records
From the first phone call to the final check, keep a record of everything. This includes:
- Copies of your insurance policy
- Receipts and invoices
- Inspection and adjuster reports
- Emails or letters exchanged with your insurer
- Photo and video evidence
Storing everything in one place makes it easier to appeal if issues arise.
Timing—Filing Quickly
Most insurance policies have strict filing windows. Depending on your state, you may only have 6 to 12 months after the event to file your roof damage insurance claim. Missing this window almost always leads to denial.
Delays can be costly. That’s why it’s smart to schedule a roof repair or inspection right away if you suspect damage.
Final Thoughts
Replacing a roof is one of the biggest expenses a homeowner can face, but the right insurance policy can make it manageable. By understanding your coverage, documenting damage, working with a licensed residential roofing contractor, and filing your claim quickly, you significantly improve your chances of approval.
If your roof has been hit by hail, wind, or fallen trees, don’t wait until small problems become major expenses. Schedule a professional roof inspection today, and let the experts guide you through the process of getting insurance to help pay for your roof replacement.
With preparation, persistence, and the right support, navigating an insurance claim doesn’t have to be overwhelming. You can protect your home and your wallet at the same time.


